Al Dean takes a look at the latest release of V-Ray for Rhino3D. With this product, has the Chaos Group created the ultimate photorealistic renderer for McNeel’s 3D modelling Swiss Army knife?
Rhino is hugely popular among architects for its advanced surface modelling capabilities. It can create incredible forms from scratch and import and export a huge array of data types. It’s also very good value for money – the list price is 995 Euros – no subscription, no maintenance costs – and this includes the powerful Grasshopper visual scripting tool.
The final reason for its popularity is, I suspect, the huge wealth of third-party add-ons that are available. One of the most popular classes of add-on is rendering and visualisation.
While Rhino has its own built-in rendering tools and its own add-ons (Flamingo and more recently, McNeel has built in the open source Cycles renderer), there are a range of third-party vendors looking to add their own special brand of magic.
This month, we’re going to take an indepth look at the latest update to one of these — namely, V-Ray for Rhino — which costs £220 per year and is developed by the Bulgarian team at Chaos Group.
If you’ve not come across V-Ray before, it’s essentially a singular physically-based rendering system that has been developed for integration in a wide spread of 3D modelling and visualisation systems. It’s currently available for 3ds max, Revit, Blender, SketchUp, Modo, Maya, Cinema 4D, Form-Z, and of course, Rhino. So let’s dig into what it does, how it does it and what you can produce with it. If you’ve used Rhino with plug-ins before, you’ll know that installation is pretty straightforward — open up the Rhi file and it’ll sort itself out. Then place all your files where you need them.
It’s then a case of configuring V-ray how you want it — either running as default or, if you have shared resources for textures and materials (V-Ray makes sharing standardised materials very easy), then you’ll need to point the various folders to where they need to go.
Getting started
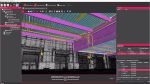
Getting up and running with V-Ray for Rhino is pretty straightforward. You’ll find a new menu is added to the pulldown and a small toolbar gives you access to the most common Rhino integrated commands, including light creation and depth of field focus control. It’ll also bring up the V-Ray dialog window.
If you’ve used V-Ray for Rhino before, you’ll immediately notice that this portion of the interface has been dramatically reworked. The whole thing looks and feels much easier to use, and considering that the workflow is split across two key dialogs (the operations inside Rhino and the V-Ray dialog), it all holds together nicely.
As a last point, it’s worth noting that if you need to switch the renderer in Rhino, you’ll find V-Ray for Rhino under the Render menu (look for Current Renderer). You’ll also need to switch your renderer viewport to use the V-Ray Interactive option from the view shading controls.
So, shall we explore the set-up and rendering process? Assuming that you’ve got your geometry render ready to go, then the best place to begin is with adding materials to that model.
Material creation
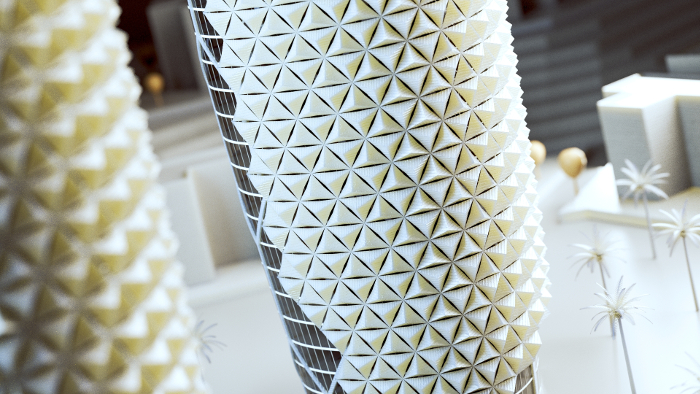
Material creation is possibly the most time-consuming aspect of using V-Ray in the context of Rhino. V-Ray has special requirements when it comes to material definitions. So, while you can take any existing Rhino materials you have in place and convert them to V-Ray materials (using the included utility), the chances are that you’re going to end up defining them from scratch in the majority of instances.
The good news is that there is a wide range of options, controls and parameters to let you do that, and there are also a number of shortcuts.
First, the system is supplied with a library of materials which you can use as a starting point, most of which are suited to AEC workflows.
Second, the web is your friend and there’s a wide range of downloadable materials for V-Ray (both free and paid) – look out for the vismat format. These can simply be opened up in V-Ray and tweaked or used directly.
There’s also a newly added method of importing from a standard file format called MDL, which does much the same thing, but may give you another source of starter materials. The other option is to use Chaos’ VRScans library. In essence, VRScans are physically measured materials that Chaos makes available for download. If you’re looking for those 100% accurate materials and references, this is an excellent place to start (though editability is limited).
It is worth noting that the VRScans library is a separate add-on, costing £260 per year for access to the 600 or more real world, captured materials. That charge comes every year. If you stop paying, the materials are watermarked.
Build your own materials
If none of these options work, then you’ve got a full set of tools to dive in and build your own materials from scratch. Of course, you don’t want to do this for every project, so V-Ray makes your materials a lot more portable – both between an individual user’s projects and between members of a design group. This means that one person who’s got all the mad materials skills on your team could generate all of its material definitions, enabling the team to standardise on them.
Rather than clogging up your project with a huge library every time, the goal here is to only add those materials you might need to your V-Ray project. That keeps things nice, tidy and manageable, and is particularly useful if you are working on group projects, where others might need to jump in and continue work.
If there’s a downside to V-Ray, it’s not to do with Chaos Group’s work, but rather some of the c lunky texture mapping controls inside Rhino. You still need to use these to control your material and how it’s applied and the more complex your material, the more complex this can get – for example, if you’re running multi-layer materials or using decals heavily.
Lighting set-up
There are two methods of working with V-Ray inside Rhino – using the existing tools in Rhino then converting the assets (lights, materials and so on) or creating them from scratch.
During our tests, we found that it was much quicker and easier to define your V-Ray assets from scratch, using the V-Ray native tools. This is particularly true when it comes to lights.
Perhaps your starting point might be adding in a HDR image as the source of reflections, lighting and background to your scene. To do this with V-Ray’s tools is pretty simple, but they’re a little hidden away — you do it using the adaptive sphere light tool.
This allows you to add in a marker using either a sphere or as a point, which makes it very hard to spot in the model views. Strangely, the position you place this in makes no difference, so I’m not too sure why they’ve even bothered with the graphical widget.
You then connect this widget up to your chosen HDR image and boom, the lights go on, your shadows start to resolve, and your image immediately starts to look better.
Of course, alongside this, you’ve also got a range of more traditional CG lighting assets — point, spot and area lights — and there are IES lights, too. If you’ve not come across IES lighting definition, then you can use manufacturer-provided datasets to build a very accurate representation of a light.
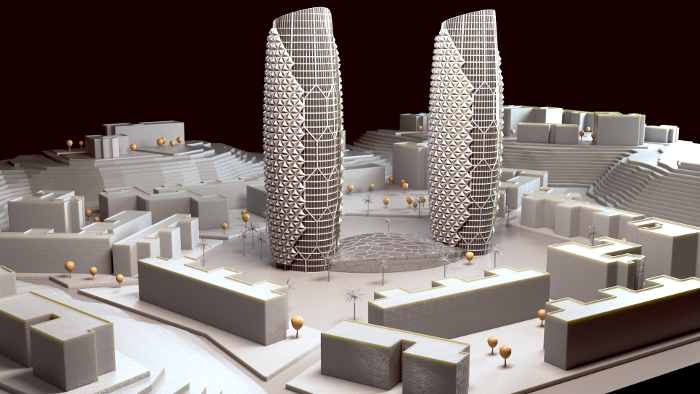
The combination of HDR environment lighting and manually created, tweaked and positioned lights means that you have a full set of lighting set-up description tools available at your disposal. Interestingly, there are some tools available if your scenes feature multiples of the same light that you’d like to control easily. Using the new ‘instancing’ option, it’s now possible to have multiple lights in your scene, all controlled from one light in the V-Ray dialogs. This will come in useful in many instances.
In our test projects, for instance, we used a single light set-up to get the style we wanted, then instanced it across everywhere that a light was needed in the light clusters.
This gave us the control we needed, from a single light and I’m sure it’ll prove particularly useful for those working in the architectural field.
The V-Ray dialog and frame buffer
These two components are the focalpoint for everything that V-Ray does. While Rhino provides the interaction with the geometry, it’s from the V-Ray dialog that materials are defined and applied, lights created and controlled, and the scene defined.
It’s also where you’ll find some of the more advanced options for the system. Some of these involve automation of Rhino to achieve specific rendering activities, but also to expose some of the more powerful aspects of V-Ray.
For example, while it’s possible to create an infinite plane using Rhino, V-Ray adds in a command to do this explicitly and once the ground plane is in place, you can then add in the materials you want.
This is also where you define the specifics of your output, both in terms of resolution, but also those ray tracing controls that can make or break a project. While V-Ray for Rhino features an interactive rendering window, which is perfect for previewing your work, as you adjust and tweak your lights, materials and model, the chances are that you’ll need higher resolution output.
During our tests, this was something that immediately escaped me, but eventually I tracked it down as an option hidden away in the V-Ray dialog — proving, as ever, that it’s worth spending time working through the tutorials and help system.
Here, under the ‘save image’ option, you’ll find a toggle for both image resolution and for image saving (which allows you to add a location).
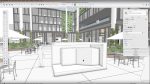
It’s also worth noting that there’s a curious workflow in terms of how you preview your resultant imagery. In the first instance, you can have a viewport in Rhino displayed as a progressive V-Ray preview. This is perfect for dialling in materials, lighting set-up and so on.
An alternative is to use the V-Ray buffer window. Once switched to interactive mode, this links to your chosen Rhino viewport, so geometry selections are easier during material set-up and you can take advantage of a denoiser that can strip some time out of your final renders.
Together, the interactive viewport, with Rhino running as per normal and four shaded views, and the V-Ray interactive frame buffer running alongside it, make for an ideal combination.
Then, when you want your final image, you kick off a non-interactive render to your required resolution – or indeed, add it to a batch for processing later.
Conclusion
V-Ray has achieved legendary status among its many users and integrations into 3ds max, Maya and other standalone visualisation systems have long been on offer, are widely accepted and have significantly matured.
The integration with Rhino differs in the sense that Rhino is not a system intended for the viz professional, but instead for designers, whether they’re working in product design or architectural design.
The good news is that, in its last few releases, Chaos Group has put in a great deal of effort into improving the user experience. Gone are the more esoteric icons and operations that could confuse new users. These have been replaced with a clearly set-out strip of operations in a toolbar, with more advanced options neatly packaged up in the V-Ray dialog.
As a result, what we’ve ended up with is a set of tools tha t let you work with the design tool of your choosing (in this instance, Rhino) in order to create stunning imagery that might have previously required you to learn and use an entirely different set of tools.
While for visualisation professionals, this option might not replace your 3ds max plus V-Ray set-up, it will certainly let you share assets between the two systems, both in terms of materials and scene data.
Having a high-end rendering engine inside Rhino certainly makes a great deal of sense. After all, if you’re already using Rhino heavily in your work, you’ll be used to navigating some of its eccentricities and have probably established your own methods to achieve your goals, which work well for you.
And, on the whole, V-Ray extends Rhino’s well-respected usefulness significantly. The combination of these two products, in fact, is pretty damn impressive.
■ £220 per year
Rhino renderers: what other options are out there?
Rhino has its own built in renderer but, as anyone that’s tried it will know, it has its limitations. McNeel’s decision to include the ray tracing Cycles engine from Blender came with Rhino 6, but still the system isn’t up to much. So what else is out there?
Radeon ProRender
Supplier: AMD Price: Free
AMD has been developing its free Radeon ProRender add-on for a number of systems for some time now. Computation can be done on both CPU and GPU, but the GPU is the favoured option. Interestingly, the product isn’t restricted to AMD GPUs and will gain benefit from compute on Nvidia boards as well, although you’ll get the best performance from one of AMD’s cards. Be careful, however, if you also have V-ray installed, as there’s current conflict between the two products.
OctaneRender
Supplier: Otoy Price: $589
Octane Render is a real-time renderer that Otoy bought out quite some time ago. It was a pioneer in the GPU computation of rendered scenes, so has gained a reputation as being incredibly quick, particularly when using consumer-level GPUs. At present, this is a more costly beast, but we’re hearing talk of licence changes coming with the Octane 4 release. These will presumably see a shift to a subscription- based deal, which could prove more attractive to new customers.
■ otoy.com
Maxwell
Supplier: Next Limit Price: €695

Maxwell has been a well-respected rendering solution for a good decade or more and it has found a home in quite a number of organisations, particularly those focused on industrial design. Alongside its integrations into SolidWorks, the Rhino variant works nicely with all of the con trols you’d expect. It is worth noting that Maxwell only works with Rhino 5. Additionally, unlike almost every other Rhino renderer, Maxwell supports the Mac version of Rhino.
TheaRender
Supplier: Altair Price: $450
We hadn’t heard of this one, until we did a little digging. We were subsequently surprised to find out it was developed by an outfit call Solid Iris, but is owned by simulation software developer, Altair Engineering. (the acquisition of Solid Iris by Altair dates back to 2016.) TheaRender for Rhino looks to support Rhino 5, includes all of the bells and whistles you would expect (HDR image support, physically based materials) and it takes advantage of your GPU for computation.
If you enjoyed this article, subscribe to our email newsletter or print / PDF magazine for FREE