Following on from last monthÝs look at Global Illumination with mental ray, the third part of Darren BrookerÝs four-part comparison of the interior lighting methods available within 3ds Max takes us through three-point lighting.
Our first two articles on the various interior lighting tools available within 3ds Max both looked at Global Illumination; first in context of the radiosity renderer, and then with mental ray. This month weÝll leave GI algorithms behind and look at how to fake the look using the standard lights and a technique called three-point lighting.
The convention of three-point lighting is one that is firmly established in cinematography, and has become one of the main foundations for CG lighting too. One of the principal reasons for this is that the technique helps to emphasise three-dimensional forms within a scene using light.
Unsurprisingly, there are three lights involved in three-point lighting, and each has a specific function. Providing the main illumination in a scene, the key light is the dominant light, or the one that casts the most obvious shadows. The job of fill lights is to model the indirect lighting that is produced by direct light bouncing off an environmentÝs surfaces. Helping to separate the subject from the background, the backlights give a scene depth.
WeÝll start by placing the key light, which represents sunlight coming through the windows to the right of the interior. Create a Target Direct light and once created right-click the Transform button to bring up the transform dialog and type in X:-13m, Y:-17m, Z:12m. Rename this light DirectKey01, then place the target at X:3m, Y:0m, Z:1m. Turn on Raytraced shadows, as these will need to penetrate the raytraced glass material, and give the light a Multiplier of 8.0.
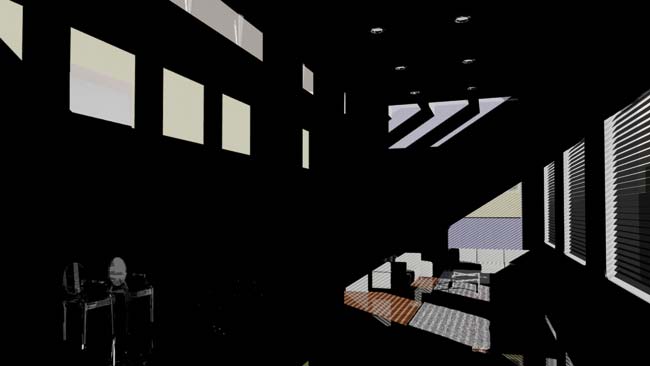
If you render now you will see a largely black interior, because there is no indirect lighting component being calculated (see Figure 1). All you should see is the direct component of this one single light, as well as the reflective elements within the scene, such as the lighting fixtures, which also have a Self-Illuminated material applied. The next task would be to place the secondary key lights within each of these fittings. Rather than do this manually, choose File > Merge and select the 03threePointLightingCeilingSpots.max file. Select all the spotlights and choose OK.
Select any one of these lights and within the Modifier Panel take a look at the way the light is set up. Firstly, you can see that shadow maps are being used here rather than raytraced shadows, which is primarily because we donÝt want sharp shadows from these lights. You should also notice that the light has Decay enabled and set to start at 2.0m, as the decay from interior light fittings is very noticeable, compared with sunlight which does not decay over the few metres it travels into a room. Additionally, the light has Far Attenuation set to Start and End at 2.0m and 8.0m.
{mospagebreak}

If you render now youÝll see that the ceiling lights now also cast light, but that again these only emit direct light and that weÝll need to mimic the indirect light that would be bouncing off the surfaces of the interior (>see Figure 2).
1. Incredibly flexible method
2. Quick to render
3. Individual control of lights makes it perfect for stylised setups
Negatives:
1. Can be time consuming to set up
2. Relighting can become complicated
Tips & Tricks
- Start with your dominant key light and move onto other keys
- For fills, start with the dominant surfaces where light would bounce
- Add an ambient occlusion pass in mental ray using an Override Material
- Tint fill lights based on the surfaces the light they represent is bouncing off
- Turn off the specular component of your fill lights
- Backlight using a falloff map in the material’s Self-Illumination slot .
This is where fill lights come in. Fill lights are used to mimic this indirect lighting component and are coloured to match the surfaces they represent. ItÝs a good idea to start with the most dominant surface in the scene in terms of indirect light, which in this case would be the floor. If you open the 03threePointLightingFill1.max file and select the FspotFill01 light, you can see that it is positioned underneath the floor, casting light back up into the scene and is coloured brown to mimic the light that would bounce off this surface. You can also see that the light has attenuation set to keep the illumination local and has no shadows, as this type of light would not cast noticeable shadows. Furthermore, the Specular component of the light has been turned off, as you can see in the Advanced Effects rollout, because bounced light does not consist of a specular component. Finally, you can see within the Spotlight Parameters rollout that the light is set up as rectangular, which is set to match the roomÝs proportions, as you can see in the viewport labelled FspotFill01.
If you take a look at the remaining fill lights in this scene, you can see that these lights represent the indirect light from the primary wall surfaces. FspotFill02 models the light bouncing off the yellow wall to the left of the scene. FspotFill03 is coloured blue to represent the indirect light from the rear wall, whilst FspotFill04 models the light bouncing from the pools of direct light on the floor. Finally, FspotFill05 represents the light bouncing off the right-hand wall with the windows.

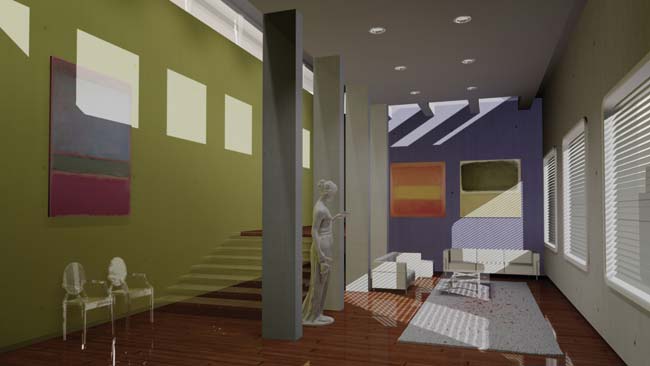
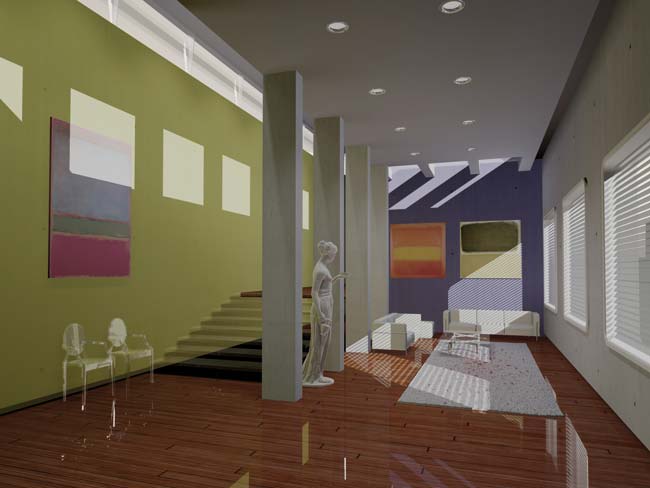
If you render now, you can see that our scene is really shaping up, when compared with any of our Global Illumination techniques from the two previous tutorials (see Figure 3). There are a couple of problems though, the area underneath the glass stairs does not look quite right and the shadows require attention. Furthermore, the rear-right portion of the room is also too dark.
{mospagebreak}
To correct the first of these issues, unhide the two lights in the scene and turn them both on. If you take a look at the parameters for these lights, you can see that one of them has a positive Multiplier value and has shadows turned on, whilst the other light has a negative value with no shadows. These two lights work in combination, with the negative Multiplier value of one light cancelling out the positive Multiplier value of the other light, leaving just the shadow rendered, as this is only on one light. This is a trick that can be very useful, particularly when you have a large area that needs illuminating, but the objects casting shadows are scattered around, like cacti in a desert environment for example. Rather than attempting to stretch your shadow map right across the environment, itÝs best to keep the shadow map (which is expensive in terms of memory at render time) tightly focused on the shadow casting object, making the rendering as efficient as possible.
To correct the second of these issues, open the 03threePointLightingFinished.max file and you will see that there is an Omni light in the affected corner of the room. With this light selected, in the top view you can see that it has been scaled along the length of the room to provide some fill light which has been stretched to accommodate the proportions of the room. This is a very handy technique for providing very localised fill light.

Other things to note about the final solution include the fact that there are extra lights that provide very subtle contact shadows between the tops of the columns and the ceiling. Once you have reached this stage of fill lighting, any further lighting will likely be refining your solution in very subtle increments, as these lights do. Furthermore, there are some things that are best cheated into materials rather than lights. In this final solution you can see that the top of the right-hand wall has been selectively darkened by putting two versions of the original diffuse map into a Mix map, with one of these versions darkened using its Output controls. Within the Mix map, a Gradient Ramp defines the mix between the two diffuse maps and with the gradient focused along the top of the wall, the wall is selectively darkened along this top edge, which mimics how it would be darkened here due to ambient occlusion. (see Figure 4)
As you can see, the result of all of these lights is a fairly complicated lighting solution, but one that has no sampling issues and that will consistently take the same time to render no matter whether objects are moving within it or not. For approaches to rendering based around radiosity or photon mapping, the solution would have to be recalculated every time something moved within the environment. Sometimes itÝs better to fake the radiosity look. However, the flipside of this is that when you are asked to change the look of the lighting scheme, the process of setting this up again can be equally as involved. However, knowing each of these approaches and how to get the best out of each is essential to using 3ds MaxÝs extensive lighting tools in the most effective manner.
Darren Brooker is a BAFTA award-winning lighting artist who has worked at many top UK studios. He works for Autodesk as a product specialist. His book, Essential CG Lighting Techniques with 3ds max, is published by Focal Press
Click here for Part l , Part ll orPart llll of this tutorial


