With only a handful of 3D modelling applications available for the iPad, it’s not often that you see a decent one. Al Dean takes a look at Shapr3D’s new offering, which promises interactive tools for concept modelling
The iPad has been something of a revelation in the design world. The idea that you might have a high-performance computing device that offers both touch and stylus input on a highly portable, high-resolution display is something architects have been crying out for.
Even so, there’s been a distinct lack of tools available for those looking to create 3D concepts on the iPad. There have been several for the engineering world (most notably Onshape, now owned by PTC) and any number of interior/floorplan related tools but these look less than professional at best. Then along came Hungarian start-up Shapr3D, looking to bring industrial-grade design tools to the device with its eponymous app. While its undoubtedly aimed at the mechanical design community, there are also some tools that make it interesting to architects.
Understanding the UI
The first thing you need, of course, is an iPad, together with the Apple Pencil, Shapr3D won’t work without it. If you’ve got those already, you’re good to go. If you’re looking at buying an Apple Pencil, then it’s worth noting that the newer Pencil 2 may not be compatible with an older iPad, as the old devices lack the wireless charging offered by the latest versions of the iPad Pro. Once you’re up and running with the hardware, it’s time to download Shapr3D from the Apple App Store and fire it up.
As with most such apps, Shapr3D offers a number of licensing options. There’s a ‘freemium’ version, which gives you a limited set of tools (e.g. data translation both in and out is limited) as well as a limited on the number of designs (just two). With the paid-for version, you get a one-month free trial and thereafter, it’s $25 per month – or $20 per month if you pay annually, representing a 20% discount.
So, what do you get for your $240 per year? You get a modelling system that works in the manner you’d imagine for an interactive device like the iPad. Technically speaking, Sharp3D has been built on the Parasolid platform (a 3D geometric modelling kernel used in Vectorworks and many of the leading 3D mechanical CAD tools) and could be classed as a direct modelling system. It offers a wide range of tools to help you build geometry from sketches and formal prismatic features, as well as adapt existing geometry by pushing, pulling and editing it. If you’ve used Sketchup, you’ll already be familiar with the workflow. Sketch profiles, push, pull, rotate into shape then use a variety of operations (Booleans, chamfers, fillets, shells etc.) to combine those primitive forms into the shape you want.
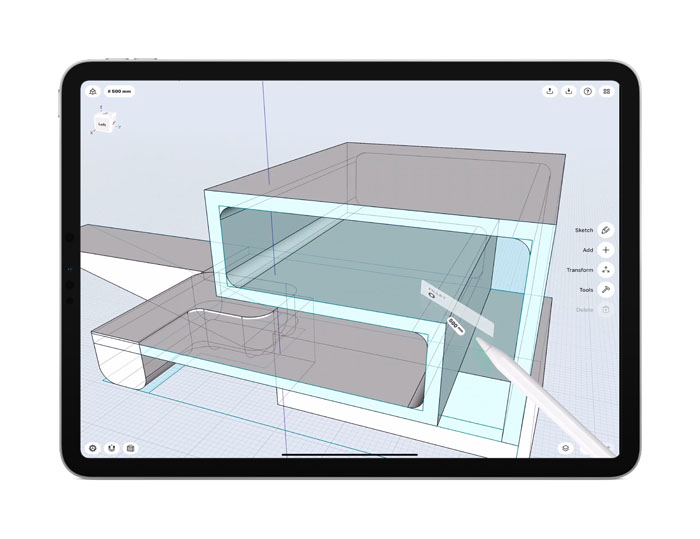
As you fire up the system and work through the training exercises, it’s clear that the team behind this app have made the most of the combination of inputs available – namely, the Apple Pencil and your fingers! The system can tell the difference between the two and works nicely around this. For example, if you’re simply navigating a model, you can use your fingers to spin, pan and zoom as per normal. The Pencil, by contrast, will just rotate.
When it comes to focusing on a specific task, double-tapping a face on the model with your finger, snaps your view to that face and you can start sketching profiles. Tapping it with the Pencil selects the face geometry and offers you an offset operation. If you double-tap with the Pencil, the whole body is selected.
Most of these gestures and interactions are intuitive, but it is worth spending time going through the very well-developed help system to pick up tips. A good way to think of the interplay between Pencil and finger is that your finger is for manipulation of the view, while the Pencil is reserved for creation, whether that’s sketching out a profile, creating a feature or editing geometry position.
Getting modelling
There are four main toolbars of operations and commands. These can be found, by default, on the left-hand side of the screen. Sketching brings up a set of sketching tools for drawing planar profiles. Here, you’ve got the full set, from lines, circles and arcs to ellipses and polygons, as well as modifiers such as offset and trim.
One sketch entity particularly worth noting are splines. You have two options: CV-driven (control vectors for control point splines) or fitted points. To lay down your CVs, you drag from the starting point, then push down on the Pencil to place the next CV, moving onwards. At the last point, you just lift up the Pencil. Those CVs are all editable for position and, in the case of fitted splines, for curvature too.
Alongside the sketch creation entities, there are also constraints available, including tangency, perpendicularly, concentricity, parallelism (horizontal/vertical) and symmetry, to name but a few. These can be applied on the fly where the system can infer them, or applied after the fact.
One thing that’s difficult to get to used, particularly if you’re used to traditional sketching in mainstream design systems, is the dimensioning workflow for sketches. Rather than requiring formal dimensions, Shapr3D works on selections and pops up possible dimensions (click line, get a length dimension. Click two lines, get an distance or angular dimension etc.) – if you formalise then and dial in the values, then they persist during any subsequent edits to that sketch. You are able to construct well-built, robust sketches – it just take a little getting used to.
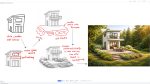
While the sketch tools give you drawing capabilities, you’ll really want to be able to build those sketches into 3D forms. The majority of tools to do this are found in the Add and Tools toolbars. Add provides you with construction geometry, such as planes and axes, as well as the ability to import geometry from the iPad file system. It will also enable you to bring in an image as a reference – and considering the usefulness of Shapr3D for working up a concept, this makes huge sense.
While those Add tools are useful, the real meat is found in the Tools toolbar. Here, you’ll get access to a number of standard and familiar feature operations. All of the classics are there: extrude, revolve, sweep, loft and shell. There are also a number of Booleans (Union, Subtract, Intersect), as well as geometry projection, offsetting and a face replace. If you’ve used direct modelling operations before, then you’ll be familiar with how these systems work. It’s not so much about creating a linear history of geometric features, as much as creating, hacking, chopping and removing geometry to achieve the form you want.
In the most recent release, the team has introduced an element of adaptivity to the user interface. Based on your current selection, the interface adapts to present you with a list of operations that can be applied using that selection. For example, if you select a single face, you can carry out a number of operations such as offsets or move, extrusions or cuts. If you then select an edge, then the selection of operations available filters down to operations that might use those two selections – such as a revolve or a loft etc.
If you’ve not used direct modelling tools before, one point that’s worth considering is how the face selection and move tools (found in the Transform toolbar) work, as opposed to the features such as extrude.
If you have an existing face that you want to either cut into or out of your solid model, you can select the face and a small glyph appears giving you a direction. Drag that into the part and it cuts. Drag it away from the part and it will extrude that face. If you want a more complex extrusion with, say, draft added, then use the extrude command – you’ll see the draft angle glyph appears on screen.
Assembly organisation
While Sharp3D doesn’t have the formal assembly modelling tools of a fullyfledged mechanical design system, it does have enough to allow you to create and manage a more complex set of parts or blocks within a single file.
Obviously, this can be done at the body level, but if you open up the manager dialogue, you’ll see a list of bodies, planes and sketches. These are given default names, but can be easily renamed, by swiping the entry to the left. You can also delete it or zoom it into the window. This window also allows you to group together bodies into folders, which act as informal subassemblies or complex mass models.
Data export
So how do you get your data out of Shapr3D? This is perhaps the most surprising part, considering the nature of the system. With the Pro version, you’re able to export your data as a Parasolid file (either X_t or X_b), STEP, IGES or OBJ. There’s also an STL export option, too – the only export option, in fact, in the freemium version.
You’re also able to export a basic 2D drawing from the system as a DWG or DXF file that includes all of the dimensions you’ve placed (and locked). There are also some nice screenshotting tools that remove the UI elements and might be useful for sharing with a colleague or throwing into a presentation.
In conclusion
Over the years, a number of 3D modelling-adjacent tools have popped up on the Apple App Store, only to quickly disappear again quite quickly. Why? The answer is that unless a user really understands upfront what they’re doing with the platform, and the various interaction methods that are not only supported but also expected, it’s very likely that the system will make little sense to them.
I’m delighted to say that the Shapr3D team has taken a very different approach. Its focus on combining finger-based interactions with the more precise input offered by the Apple Pencil makes complete sense.
If you’ve used a direct modelling system such as SketchUp before and are familiar with its modelling techniques, then you’ll be able to jump right in. If not, then you might need some time to get your head around the workflow. There are a few tutorials that show architecturally focused workflows, but the bulk of the tutorials are for mechanical design – they’re equally as useful for learning the ins and outs of the tool.
If I had just one tip to help you get up to speed, it’s to consider this as a conceptualisation and 3D thinking tool, rather than a fully featured 3D design system. You just need to forget about being super-precise and building complex models. Instead, just sketch, hack, slice and experiment and see what you get.
It’s also worth considering Sharp3D purely from a workflow perspective. If you already have an iPad as part of your workflow and day-to-day work toolset, then you’ll probably be receiving CAD geometry in your email and/or via file share. Shapr3D allows you to view those files using robust Parasolid-based tools and potentially make very quick edits to them. Just the ability to view is useful. If the Sharp3D team also built in a few mark-up tools, that would make the app even more useful.
If you’re curious about what this system can do, download it, get yourself an Apple Pencil and give it a whirl. There’s literally nothing to lose. You’ll find a system that lets you sketch out a quick model, try out an idea, and see what you get and it could quickly become an important step in your conceptualisation and ideation process.
Architectural design & the iPad: what else is there?
To review Sharp3D, I invested in a more up-to-date iPad. To be frank, I’d stopped using these devices after their first generation, for a number of reasons. But it turns out there’s been some wonderful work over the intervening period. The new iPad Pro is a great example of the build quality that Apple offers.
The Apple Pencil is really something else. For those who have been using a lagging stylus and become accustomed to working around parallax problems resulting from poor calibration of pen input devices, it’s a refreshing step change.
The Pencil 2, in particular, with its magnetic attachment and wireless charging is practically a miracle. (On the subject of charging, I’ve gone fully USB-C of late, so having the iPad use the same connectors makes life a lot easier, should we ever start travelling again).
It’s also worth noting that multitasking on the iPad is vastly improved, particularly using window-in-window or split screen. It may take a few minutes to work out how to do this, but it makes working with multiple applications much easier.
The other thing that impressed me about the standard device and software set-up is the Sidecar application. If you’re a desktop/ laptop Mac user, this lets you view your main screen on the iPad as a second screen. In these days where we’re all trying to work efficiently from home, that’s really valuable (not least in terms of space-saving), especially if you’re missing your office-based multi-monitor set-up.
If you’ve seen Astropad for the iPad/Mac, it’s like that – but being native to your hardware, it doesn’t cost you £10 a month to use. However, Astropad has a few benefits in terms of control and there’s a client application coming soon that would let you use your iPad as a companion, pen-enabled device with Microsoft Windows.
Exploring the App store
Since I had the iPad in hand and the kids hadn’t managed yet to steal it to play AR games, I figured now was a good time to explore what other applications for the designer and engineer it could run.
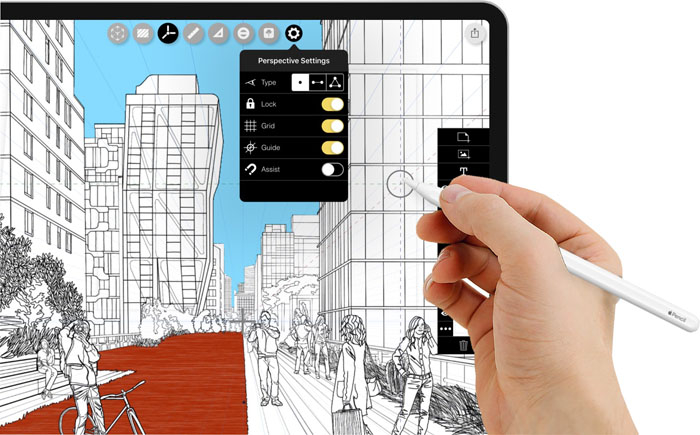
One system I was keen to try out was Procreate for digital sketching. While I could wax lyrical about how smart Procreate is, how the drawing experience, brush development and user experience is wonderful, the simple fact is that it costs just £9.99 – no subscriptions, no ongoing license fee. That’s a ridiculous bargain, especially compared to the cost of a license for Adobe’s Photoshop or Illustrator. If you’re exploring Procreate for design purposes, then I also highly recommend the Procreate brush sets from Spencer Nugent, available at sketch-a-day.com.
Morphilo’s Trace application also has to be a front runner. While it’s a sketching app, it has some serious tools for the architectural designer – import and scaling of plans and maps (even direct from google maps), AR tools for perspective and much more. Considering it’s $17.99 for a professional license for a year, that’s another bargain that’s worth exploring (there’s a freemium version too).
Another product to consider is the venerable SketchBook from Autodesk – one of the first sketching systems and still one of the best.
Beyond sketching
The iPad Pro isn’t just for sketching and modelling – the 2020 model features built-in LiDAR scanning capabilities and mobile mapping startup Sitescape is developing a reality capture app to take advantage. The software allows users to to create dimensionally accurate point cloud datasets that can be used for progress monitoring, documentation, and remote site access/collaboration. According to the developers, accuracy is said to be around +/- 1” for linear measurements, while the max range of the LiDAR sensor is 15 feet.
If you enjoyed this article, subscribe to our email newsletter or print / PDF magazine for FREE