Many consider V-Ray to be the gold standard for architectural design visualisation. Now, its developers are making the powerful ray trace renderer available inside Revit, with push-button control so it can be used by non-experts. By Greg Corke
To architectural design visualisation specialists, V-Ray needs no introduction. The powerful, quick ray trace rendering software is a favourite in the architectural CG community.
Chaos Group, its developer, boasts that 92 of the top 100 architecture firms in the world render with V-Ray every day. It’s a bold claim, but we’ve no reason to doubt it. The software has featured in virtually all of the rendering and animation projects we have covered in AEC Magazine over the years.
V-Ray is available as a standalone renderer, but is commonly used as a plug-in for Autodesk 3ds Max. It’s designed for rendering experts, with hundreds of different settings that can be tweaked to deliver that perfect image. But now its developers are targeting a completely different type of user with a new plug-in for Revit.
V-Ray for Revit, currently in beta, has been designed from the ground up to be easy to use — push-button simple, if you will. However, unlike many of the renderers that are built into CAD and BIM software, it also gives users access to some of the more advanced controls, albeit in a dumbed-down way.
Plugged into Revit
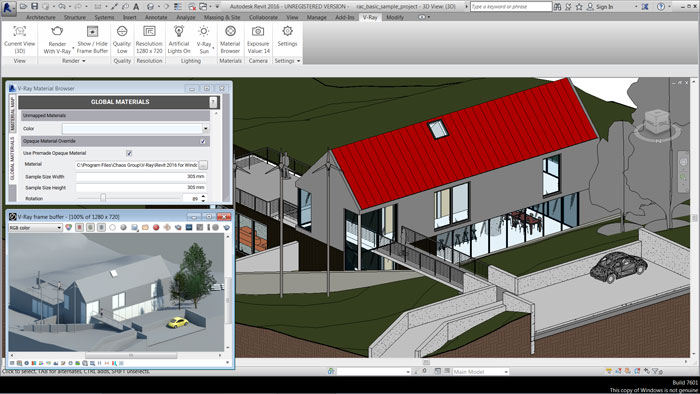
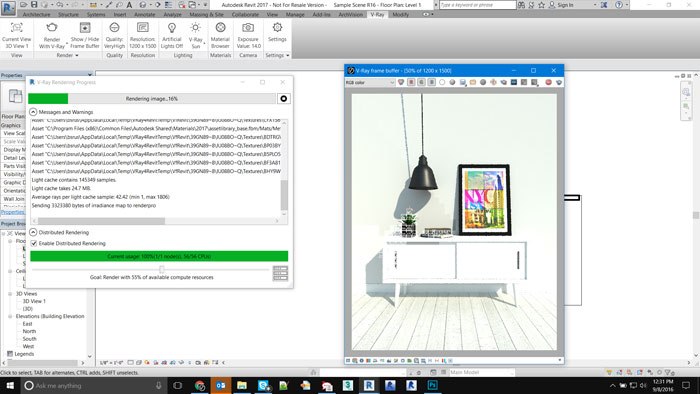
V-Ray for Revit runs as a plug-in directly inside Revit (versions 2014 to 2017), so no import or export is required. It has its own ribbon in the Revit UI, with simple controls for quality, lighting, exposure and resolution. As soon as the render button is hit, the V-Ray frame buffer (rendering window) pops up and the image refines until it is finished.
To render a scene, simply choose a camera view from a pulldown list. It is not currently possible to render an active camera view, as the plug-in becomes unavailable. Chaos Group says this issue affects all Revit API applications, including those written by Autodesk, and that it’s currently working with the Revit development team to find a solution. Non-camera orthographic views can be rendered when active.
Scenes can be lit in a number of ways — by artificial lights, dome lights (with an optional HDR environment image) or sun (which gets its location, date and time settings from the Revit sun). Camera exposure can also be adjusted, according to 15 pre-defined settings for interior and exterior environments. These range from ‘well-lit’ and ‘office’ to ‘night’ and ‘low light’. With some of the longer exposures, a little experimentation is needed to get the best results.

Even when the render has started, it is still possible to fine-tune the image. The software provides simple slider controls for adjusting exposure, contrast, hue/ saturation and colour balance in real time. These can be applied during or after the render.
Rendering engines There are two rendering engines built into the software. V-Ray, the standard production engine, delivers the best quality results, while V-Ray RT, a so-called real time engine, is very useful for tweaking settings before committing to a time- consuming final render.
While the production engine runs solely on Central Processing Units (CPUs), the calculations for the real time engine can also be done on Graphics Processing Unit (GPUs). Chaos Group currently supports Nvidia GPUs through CUDA, but will be adding OpenCL support later. This will allow the software to run with pretty much any GPU, including those from AMD.
The key benefit of V-Ray RT is being able to make changes to the scene in real time, without having to re-start the render. This can be great if you want to play with lighting and exposure settings or explore different materials.
As changes are made, the image will automatically start to re-render in the frame buffer. The speed at which this happens will depend on your hardware, so if this becomes an important part of your workflow then you may need to consider investing in a more powerful GPU, or multiple thereof.
While V-Ray RT can be used as a production renderer, for best results with less image noise, Chaos Group recommends using the standard V-Ray engine, which scales well with multi-core CPUs.
Here, there are five quality settings. By default, draft, low, medium and high use a progressive renderer, which is quicker. ‘Very high’ uses a bucket renderer, and while this delivers the best results, render times can be significantly longer (see BOXX review here).
More advanced users can change depth of field — a feature that is not commonly available in built-in renderers like Autodesk Raytracer. It provides control over camera settings, such as focus distance, ISO, F number and shutter speed, and is great for producing more stylised output. Other advanced features include environment fog, which can be used to give the effect of light streaming through a window, and aerial perspective, which produces fog in the distance.

Materials
In developing V-Ray for Revit, the primary consideration for the developers was that the rendering process would be non-destructive to the BIM workflow. Naturally, this meant working directly inside Revit, but it also meant users would not have to change the material definitions within the Revit model.
By default, when you click render in V-Ray for Revit, the software automatically converts all of the Revit materials into V-Ray materials — a process that takes a matter of seconds. The developers have gone through the process of mapping Revit materials to V-Ray materials in the best possible way but, if required, users can also adjust the mapping by tweaking sample size and rotation.
If the user wants to change the materials, say to try out different ideas, use a material that is not available inside Revit or simply to get a better effect, any Revit material can be mapped to any V-Ray material, texture or colour. In a few clicks, all opaque and transparent materials can also be overridden with diagrammatic materials for a quick conceptual render. Distributed rendering V-Ray for Revit also comes with a new distributed rendering technology called Swarm, which is incredibly easy to use (also covered in BOXX review here). While Swarm will work with dedicated render nodes, it is really designed to let small workgroups share spare compute resources on networked workstations. It currently works with CPUs and CUDA GPUs. OpenCL support (for AMD GPUs) will come later. The software runs as a background service on each machine, and monitors CPU and GPU usage in real time. If a machine has any spare capacity, then some of this is made available to Swarm. When a user goes into a meeting or makes a cup of tea, for example, their machine will automatically offer up all of its compute resources. Conversely, if a user wants to retain full control over his or her machine, it can be removed from the pool simply by unticking a box in the web interface.
Swarm does not use a render queue, so jobs are processed on a first come, first served basis. However, each user can control the priority of their job with a slider that dictates the percentage of available computing power he or she would like to use. Of course, to make this work, there needs to be good communication within the team, otherwise everyone just sets it to 100%.
Each Swarm machine requires a V-Ray Render Node license, regardless of how many CPU cores or GPUs it has. While Chaos Group has not announced pricing, it seems likely that one will come free with every V-Ray for Revit license. Additional licenses can be bought in packs or rented to make it easy for firms to scale up compute power for urgent projects.
Swarm technology will eventually be available for Rhino, SketchUp, Max and Maya with Render Node licenses working across all products.
Conclusion

From our experiences with a beta release of the software, Chaos Group looks to have done an excellent job of making its specialist rendering technology accessible to design viz novices.
However, rather than stripping everything back and delivering a basic push button renderer inside Revit, architects can still get under the hood for more control, should they need it. This is one way the software differentiates itself from the Autodesk Raytracer built into Revit.
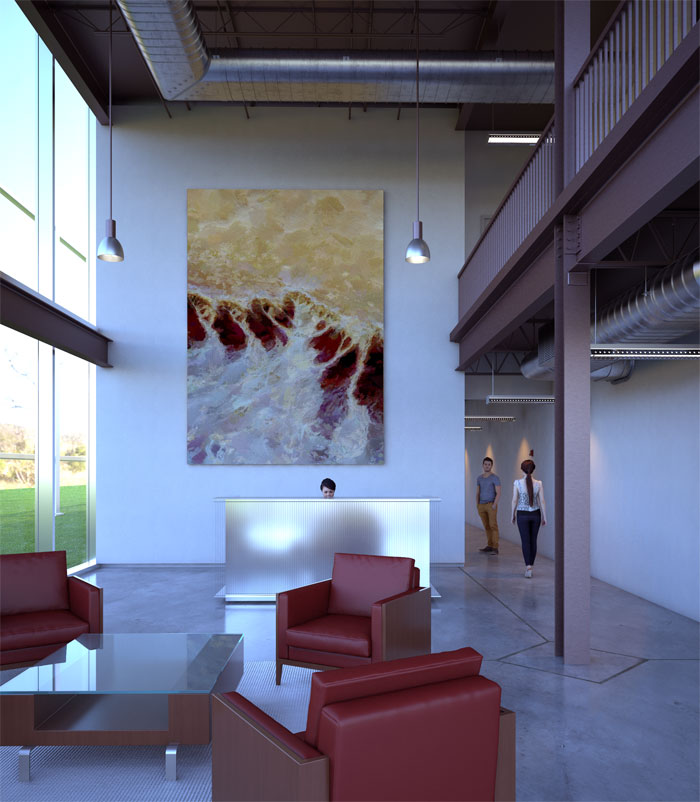
With a little experimentation, it is possible to get some really nice effects. This not only increases the impact design viz can have on architectural design, but also helps reduce the reliance on in-house design viz specialists. This can free up their time for exploring new technologies such as VR or real-time game engines.
But there is a bigger picture here. With plug-ins also available for SketchUp, Rhino and 3ds Max, architectural firms can benefit from a streamlined rendering pipeline, from concept through design, all the way into marketing.
Finally, if Swarm, the simple to use distributed rendering technology, delers on its promise, it could have a major impact on how small architectural firms approach design viz hardware purchases. V-Ray for Revit is only likely to be used part time, so sharing compute resources over a network makes perfect sense — no need to invest in powerful hardware for every user. The software is very easy to setup, and works well with a dedicated render node (again, covered in BOXX review here). It will be interesting to see how well this translates to a real-world environment with machines of mixed specifications and varied workloads.
V-Ray for Revit is due to ship later this year. Pricing has not yet been confirmed.
If you enjoyed this article, subscribe to AEC Magazine for FREE


